Yes, you can microwave cream cheese to soften it, but remove the foil wrapper first and heat in short 10-second intervals to avoid melting.
You set out to make a cheesecake or a batch of frosting. You have the sugar, the vanilla, and the mixer ready. Then you realize the block of cream cheese is still sitting in the refrigerator, cold and hard as a brick. We have all been there. Waiting for dairy to reach room temperature naturally takes time you might not have.
The microwave is the fastest tool in your kitchen for this specific problem. However, dairy products are sensitive to sudden heat. If you blast the block on high power for too long, you end up with a separated, oily puddle rather than a smooth ingredient. The difference between perfectly soft and ruined happens in seconds. This guide details the exact steps to get the texture right without compromising your recipe.
Can I Microwave Cream Cheese To Soften It?
The short answer is yes. Using the microwave is a standard kitchen shortcut accepted by home bakers and professionals alike. It cuts the waiting time from an hour down to less than a minute. When you ask yourself, “can i microwave cream cheese to soften it,” you likely worry about food safety or ruining the texture. Both are valid concerns, but they are easy to manage.
Microwaves work by agitating water molecules to create heat. Cream cheese has a high fat content and plenty of moisture. This combination means it heats up unevenly. The center might stay cold while the edges begin to bubble and separate. The fat solids in cheese can break if they get too hot, resulting in a grainy texture that no amount of whipping will fix. You must use gentle, controlled heat.
Safety is the other factor. The biggest risk here is not the cheese itself, but the packaging. Most standard 8-ounce blocks come wrapped in silver foil. Metal and microwaves never mix. You must remove every piece of that wrapper before you start. Once the cheese is out of the foil, the microwave is a safe and effective method to get your ingredients ready for mixing.
How To Soften Cream Cheese In The Microwave
This process requires attention. You cannot walk away from the microwave. The goal is to take the chill off, not to cook the cheese. Follow this method for an 8-ounce block.
Step 1: Unwrap And Plate
Remove the cream cheese from the cardboard box. Peel away the foil wrapper completely. Check the bottom of the block to make sure no small strips of foil remain stuck to the cheese. Place the cold block on a microwave-safe plate or bowl. Do not use paper towels, as the cheese might stick to them as it softens.
Step 2: Adjust Power Settings
Standard microwaves operate at high power (100%) by default. This is too aggressive for dairy. Set your microwave to 50% power or use the “Defrost” setting. This cycles the magnetron on and off, allowing the heat to distribute more evenly through the block rather than just attacking the outside layers.
Step 3: Heat In Intervals
Microwave the block for 10 seconds. Open the door and touch the center of the cheese. It will likely still feel firm. Flip the block over. Microwave for another 10 seconds. Check the texture again. It should yield slightly when you press it. If it is still hard, flip it again and add 5 to 10 seconds. Repeat this until the cheese is pliable but not hot.
Microwave Timing For Different Portions
The time you need depends heavily on how much cheese you have and the wattage of your appliance. A single 8-ounce block behaves differently than a bulk 3-pound block or a leftover chunk.
This table outlines general timing guidelines based on a standard 1000-watt microwave at 50% power.
| Amount of Cream Cheese | Estimated Time (50% Power) | Texture Check Interval |
|---|---|---|
| 8 oz (Standard Block) | 15 to 25 Seconds | Every 10 Seconds |
| 3 oz (Small Package) | 10 to 15 Seconds | Every 5 Seconds |
| 16 oz (Two Blocks) | 30 to 45 Seconds | Every 15 Seconds |
| Frozen Block | 1 to 2 Minutes | Every 30 Seconds |
| Whipped Tub (Plastic) | 10 to 15 Seconds | Every 5 Seconds |
| Diced Cubes (1 inch) | 10 to 15 Seconds | Continuous Watch |
| Leftover Chunk (Random) | 5 to 10 Seconds | Every 5 Seconds |
Common Mistakes To Avoid
Speed causes errors. Even though this method is fast, rushing the process often leads to waste. Watch out for these specific pitfalls that home cooks often encounter.
Forgetting The Foil Wrapper
This sounds obvious, but it happens frequently. The foil wrapper creates sparks (arcing) immediately. This can scorch the cheese, creating a burnt taste that permeates the whole block. Worse, it can damage the interior of your microwave or start a fire. Always double-check that you have removed the foil. If you see sparks, stop the machine instantly.
Overheating The Cheese
There is a fine line between soft and melted. Soft cream cheese holds its shape but dents easily. Melted cream cheese looks glossy, liquid, and greasy. If the cheese gets too hot, the emulsion breaks. This means the fat separates from the liquid and solids. If you add melted, separated cheese to a cheesecake batter, the final cake will be oily and may not set correctly. If you overheat it, put it back in the fridge for ten minutes to see if it firms up, though the texture may remain grainy.
Ignoring The Power Level
Microwaving on full power is the fastest way to get uneven results. The outside melts into a puddle while the core remains frozen. By the time the center is soft, the rest is ruined. Lowering the power is the only way to ensure consistent softening from edge to center.
Can I Microwave Cream Cheese To Soften It For Frosting?
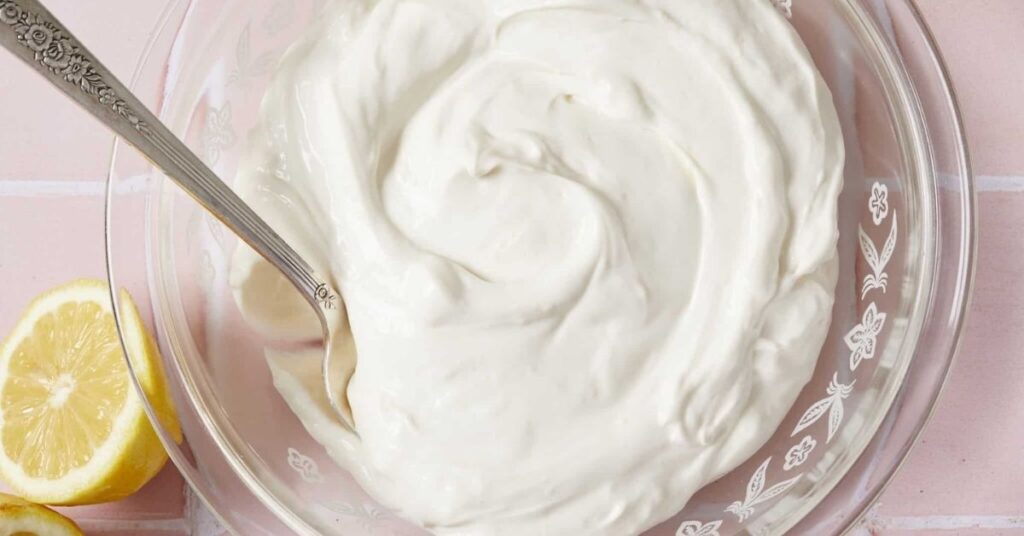
You need to be extra careful when the end goal is frosting. Buttercream and cream cheese frosting rely on structure. If the cheese is warm or slightly melted, the frosting will be runny. It will slide right off your cupcakes or layer cake.
For frosting, the cheese should be cool to the touch but pliable. It needs to blend with the butter without leaving lumps, but it must still hold air when whipped. When you ask, “can i microwave cream cheese to soften it for frosting,” the answer is yes, but stop heating while the block is still slightly firm in the very center. The residual heat will finish the job as you move it to the mixing bowl. If you accidentally get it warm, do not mix it with the butter yet. The heat will melt the butter, and you will end up with a soupy glaze instead of fluffy frosting.
Alternative Methods Without A Microwave
Perhaps your microwave is broken, or you simply prefer a method with less risk of overheating. Several other ways exist to bring cheese to room temperature. They take longer than the microwave but offer more consistent safety for the ingredient.
The Warm Water Bath
This is the second-fastest method. Keep the cream cheese in its foil wrapper. Do not open it. Fill a bowl with warm (not boiling) tap water. Submerge the sealed block in the water. Let it sit for about 10 to 15 minutes. The water transfers heat gently through the foil. Flip the block every 5 minutes. This method produces a very evenly softened block with zero risk of drying out edges.
The Cubing Technique
Surface area speeds up the process. Take the cold block out of the wrapper and place it on a cutting board. Use a sharp knife to cut the cheese into small 1-inch cubes. Spread these cubes out on a plate. Because the air can reach the center of the cheese more easily, these cubes will soften in about 20 to 30 minutes, compared to the hour needed for a solid block.
The Countertop Wait
This is the classic method. Simply leave the block on the counter. Depending on the temperature of your kitchen, this takes 45 minutes to an hour. It is foolproof but slow. Just remember food safety rules. According to the USDA Food Safety and Inspection Service, perishable food should not sit out at room temperature for more than two hours.
Why Texture Matters For Baking
You might wonder why you cannot just use cold cream cheese. The reason lies in how fats mix. When cream cheese is cold, the fat molecules are rigid. If you try to beat cold cheese with sugar or eggs, it breaks into tiny lumps rather than blending. These lumps persist through baking.
In a cheesecake, those lumps create a gritty texture. In a dip, they clog chips or crackers. Softened cheese allows the sugar crystals to cut into the fat, creating tiny air pockets. This aeration gives cheesecakes their lift and frostings their volume. Without proper softening, your final product will feel heavy and dense.
Comparing Softening Methods
Choosing the right method depends on how much time you have and what you are making. Here is a breakdown of how the different techniques stack up against each other.
| Method | Time Required | Risk Level |
|---|---|---|
| Microwave (50% Power) | 15 to 30 Seconds | High (Risk of melting) |
| Warm Water Bath | 10 to 15 Minutes | Low (Very consistent) |
| Cubing on Plate | 20 to 30 Minutes | Low (Requires cutting board) |
| Countertop (Whole Block) | 1 Hour | None (Safest for texture) |
| Beating (Stand Mixer) | 5 Minutes | Medium (Can warm up mixer) |
| Near Oven (Ambient Heat) | 15 to 20 Minutes | Low (Variable heat source) |
| Hand Massage (In Wrapper) | 5 to 10 Minutes | Low (Messy if wrapper breaks) |
Tips For Whipped Cream Cheese Tubs
Most recipes call for block cream cheese. Tubs of whipped cream cheese contain more air and often have stabilizers added to keep them spreadable. However, you might still need to soften them if your fridge runs very cold.
You can microwave the tub, but check the packaging first. Some plastic tubs are not microwave-safe and might warp or leach chemicals. It is safer to scoop the cheese into a glass bowl before heating. Because whipped cheese contains air, it softens much faster than a solid block. Reduce your intervals to 5 seconds.
Fixing Over-Softened Cheese
Sometimes you blink, and the 10 seconds turns into 30, and you have a bowl of white soup. Do not panic. If the cheese is just melted but not separated (oily), you can often save it.
Place the bowl back in the refrigerator for 10 to 15 minutes. The fats will solidify again. Stir it every 5 minutes to ensure it cools evenly. If the cheese has separated and looks oily, try whisking in a tablespoon of cold milk to help re-emulsify the mixture. If that fails, you might need to use that batch for a cooked sauce where texture is less critical, rather than a cheesecake.
Hygiene And Clean Up
Cream cheese leaves a fatty residue that can be hard to clean once it dries. If you splatter cheese inside the microwave, wipe it up immediately with a damp cloth while it is still warm and soft. Once it hardens, it becomes like cement.
Always use a clean plate. Do not place the unwrapped cheese directly on the microwave’s glass turntable. The turntable is often not sanitary enough for direct food contact, and cleaning cheese out of the turntable’s roller tracks is frustrating work.
Using Softened Cheese In Recipes
Once your cheese is soft, use it immediately. If you let it sit out too long after heating, it enters the food safety danger zone. Plus, if it sits too long, the surface will dry out and form a yellow, crusty skin. If you are not ready to mix right away, cover the bowl with plastic wrap.
The answer to the common query “can i microwave cream cheese to soften it” is yes, and it is a trick that saves countless recipes from failure. Whether you are making a quick bagel spread or an elaborate holiday dessert, this method ensures your dairy is ready to work when you are.
Remember that different brands have different water contents. Generic store brands often have more water and soften faster than premium brands like Philadelphia. Always test the texture with your finger after the first 10 seconds regardless of what the package says.
Summary Of The Process
To recap, getting your cream cheese ready is simple. Remove all foil. Place the cheese on a plate. Lower your power to 50%. Heat in short bursts. Flip the block. Check the texture. Stop before it gets hot. By following these rules, you get perfectly pliable cheese without the hour-long wait.
