Yes, you can microwave corn on the cob; cooking it in the husk acts as a natural steamer that yields tender, sweet kernels in roughly four minutes.
You want fresh, sweet corn, but you do not want to boil a giant pot of water on a hot day. The microwave is actually the superior tool for this job. It traps the corn’s natural sugars inside the kernel rather than leaching them out into boiling water. This method is fast, creates less mess, and results in a better texture.
Understanding the right timing and preparation techniques ensures you get a perfect bite every time. You can cook corn with the husk, without the husk using a wet paper towel, or even reheat leftovers without drying them out. The following sections break down the specific steps, timing charts, and safety tips you need.
Can I Microwave Corn On The Cob?
Many home cooks hesitate to put fresh produce in the microwave, fearing it might turn rubbery or lose flavor. However, when you ask, “Can I microwave corn on the cob?” the answer is not just a yes; it is often the preferred method by food scientists. The electromagnetic waves excite the water molecules inside the kernels and the stalk, generating steam from the inside out.
When you leave the husk on, you create a tight, natural pressure cooker. The layers of green husk hold the steam close to the kernels. This process cooks the corn in its own juices, preserving the sweet corn flavor that boiling water often dilutes. Even if you bought shucked corn, you can replicate this environment with a damp paper towel or a microwave-safe lid.
Speed is the other major advantage. Boiling water takes 10 to 15 minutes just to reach a rolling boil, plus cooking time. The microwave finishes the job before a pot of water would even start to bubble. This efficiency makes it an excellent choice for weeknight dinners or a quick solo snack.
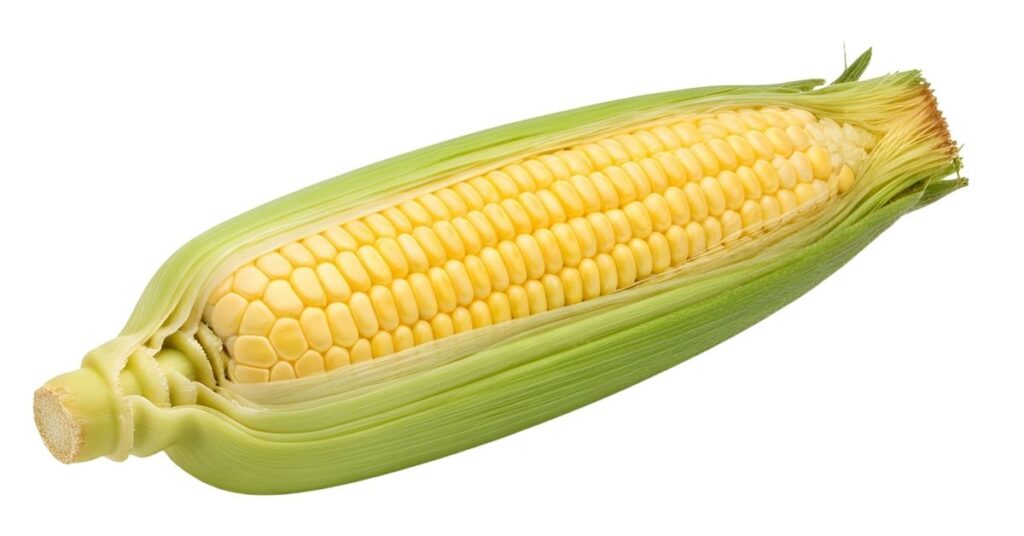
The Husk Method: Nature’s Perfect Steamer
Cooking corn in the husk is the gold standard for microwave preparation. The husk prevents the kernels from drying out and makes silk removal incredibly easy after cooking.
Preparation Steps
Start by inspecting your corn. You want ears with tight, green husks and golden brown silks. Avoid ears with dry, pale husks, as they may not trap steam effectively. Do not peel anything yet. Place the entire ear, untrimmed, directly onto the microwave turntable. If your microwave is small, you may need to trim the long stalk, but leave the top tassel intact to seal in heat.
The Cooking Process
Microwave on high power. For a single ear of average size, four minutes is the standard baseline. If you have a particularly powerful microwave (1200 watts or higher), you might check it at the three-minute mark. You will hear the water inside the corn hissing slightly; this is a good sign. The corn is done when the kernels feel hot through the husk and the smell of cooked sweet corn fills the kitchen.
The Silk Removal Trick
Once the timer beeps, use an oven mitt to remove the corn. It will be scalding hot. Let it rest on a cutting board for two minutes. This rest period finishes the cooking process and makes the cob safe to handle. Take a sharp chef’s knife and cut off the bottom inch of the corn (the stalk end). Grip the top of the corn by the tassel and shake firmly. The clean cob should slide right out, leaving the silks behind in the husk.
Cooking Time And Quantity Guide
Microwaves vary in power, and the amount of food you add drastically changes the cooking time. Crowding the turntable distributes the energy across more mass, meaning you must increase the time significantly for each additional ear.
This table outlines the cooking times based on quantity and microwave wattage. Adjust slightly based on the size of your corn ears.
| Quantity of Ears | Microwave Wattage | Estimated Cook Time |
|---|---|---|
| 1 Ear | 700 – 900 Watts | 4 to 5 Minutes |
| 1 Ear | 1000 – 1200 Watts | 3 to 4 Minutes |
| 2 Ears | 700 – 900 Watts | 8 to 9 Minutes |
| 2 Ears | 1000 – 1200 Watts | 6 to 7 Minutes |
| 3 Ears | 1000+ Watts | 10 to 12 Minutes |
| 4 Ears | 1000+ Watts | 14 to 16 Minutes |
| Shucked (1 Ear) | Standard (1000W) | 3 to 4 Minutes |
Microwaving Shucked Corn
Sometimes you buy corn that has already been cleaned, or you shucked it days ago. You can still use the microwave, but you must replace the missing husk with a surrogate steam trap.
The Wet Paper Towel Technique
Wrap each ear individually in a damp paper towel. The water in the towel turns to steam, keeping the kernels plump. Place the wrapped corn on a microwave-safe plate. Cook for slightly less time than you would for corn in the husk—usually about three minutes for one ear. The direct exposure to the microwaves heat the kernels faster without the thick layers of husk to penetrate.
Using A Dish And Plastic Wrap
Another reliable method involves a microwave-safe baking dish. Place the shucked ears in the dish and add two tablespoons of water to the bottom. Cover the dish tightly with microwave-safe plastic wrap, poking two small holes for ventilation. This creates a dedicated steam chamber. Cook for 4 to 5 minutes. Be extremely careful when removing the plastic wrap, as the escaping steam can burn your fingers instantly.
Nutritional Benefits Of Microwaving
Many people worry that microwaves destroy nutrients, but the opposite is often true for vegetables. Because microwaving requires little to no added water and cooks food quickly, it preserves water-soluble vitamins like Vitamin C and folate better than boiling. When you boil corn, nutrients leech out into the water, which you then pour down the drain. According to Harvard Health Publishing, the cooking method that best retains nutrients is one that cooks quickly, heats food for the shortest amount of time, and uses as little liquid as possible.
By steaming the corn in its own moisture, you keep the healthy compounds inside the kernel where they belong. This makes the microwave method not just faster, but potentially healthier.
Can I Microwave Corn On The Cob? – Troubleshooting
Even with a simple method, things can go wrong. If your corn comes out chewy or dry, you likely overcooked it. Microwaves cook unevenly, so hot spots can occur.
Solving The Dry Kernel Issue
If you find the kernels are dented or tough, reduce your power level to 80% and extend the cooking time by one minute. This allows the heat to penetrate to the center of the cob without overheating the exterior kernels. If you are cooking shucked corn, ensure your paper towel is wet enough; it should not be dripping, but it must be fully saturated.
Fixing Uneven Cooking
If one side of the ear is cooked but the other is raw, pause the microwave halfway through the cycle. Flip the corn over and rotate it. This is necessary in older microwaves without turntables or when cooking three or four ears at once. Always arrange multiple ears like the spokes of a wheel, leaving the center of the turntable empty, as this area receives the least energy.
Safety And Handling
Corn straight from the microwave is deceivingly hot. The interior of the cob holds heat like a dense stone. The steam trapped inside the husk is much hotter than boiling water and can cause severe burns.
Use tongs or a thick towel to transfer the corn to a counter. Never peel the husk immediately after the beep. The two-minute resting period is a safety requirement, not just a cooking suggestion. If you used the plastic wrap method, peel the wrap away from your face to direct the steam cloud away from your skin.
Flavoring Your Corn
Once your corn is shucked and hot, you have a blank canvas. While butter and salt are classic, the texture of microwaved corn stands up well to heavy sauces.
The Butter Roll
To butter corn without the mess, place a tablespoon of butter on a slice of bread. Place the hot corn on the bread and rotate it. The bread acts as a brush, melting the butter evenly over the kernels. You can eat the buttery bread afterward.
Elote Style
For a Mexican street corn vibe, brush the cooked corn with mayonnaise. Roll it in cotija cheese and sprinkle with chili powder and a squeeze of lime. The sweetness of the microwave-steamed corn pairs perfectly with the salty cheese and acidic lime.
Storage And Reheating
You can microwave corn on the cob in batches to save for later. Proper storage ensures it stays safe and tasty. Bacteria can grow on cooked vegetables if left at room temperature for too long, so move leftovers to the fridge promptly.
According to the USDA Food Safety and Inspection Service, cooked corn should be refrigerated within two hours of cooking. Refer to the table below for storage limits to ensure you eat your leftovers while they are still good.
| Storage Method | Condition | Max Shelf Life |
|---|---|---|
| Room Temperature | Cooked (Husk on/off) | 2 Hours |
| Refrigerator | Cooked, Husk Removed | 3 to 5 Days |
| Refrigerator | Raw, Husk On | 1 to 2 Days |
| Freezer | Blanched/Cooked, Off Cob | 10 to 12 Months |
| Freezer | Cooked, On Cob | 6 to 8 Months |
Reheating Without Rubberiness
Reheating corn requires gentle heat. Do not blast a cold, cooked cob on high power for two minutes; it will turn into a hard, chewy mess. Wrap the cold corn in a damp paper towel. Microwave on 50% power for 45-second intervals, rotating in between. The moisture from the towel will re-steam the kernels, restoring some of the snap they lost in the fridge.
Comparison: Microwave vs. Grill vs. Boil
While the microwave wins on speed, understanding how it compares to other methods helps you choose the right tool for the meal you are planning.
Boiling
Boiling is great for feeding a crowd. If you need to cook 12 ears for a barbecue, a large stockpot is more efficient than microwaving ears in batches of three. However, boiling yields a softer, wetter kernel that can sometimes taste watered down. It also takes the longest due to water heating time.
Grilling
Grilling imparts a smoky, charred flavor that no other method can replicate. It adds complexity and texture. However, grilling requires fire management and takes about 15 to 20 minutes. It is also easy to dry out the corn if you are not careful. The microwave is strictly for moist, steamed corn; it will never give you char marks.
Microwaving
This method offers the purest corn flavor. It is the best choice for 1 to 4 people. It requires zero water, creates zero dirty pots, and delivers consistent results. It is the most energy-efficient method, as you are only heating the food, not liters of water or the air around a grill.
Serving Suggestions
You can cut the kernels off the cob after microwaving to use in salads or salsas. Because the kernels remain firm and sweet, they add a nice pop to a salad that boiled corn might lack. Stand the cob upright in a wide bowl and slice downward with a knife. The bowl catches the kernels and the “milk” from the cob, which you should scrape out and add to your dish for extra flavor.
If you are serving the corn on the cob, consider using corn holders. Since the cob cooks from the inside out, the internal temperature remains high for a long time. Holders keep your fingers safe while you enjoy the corn while it is still steaming hot.
So, can I microwave corn on the cob? Absolutely. It is a reliable, safe, and delicious way to prepare this summer staple. Whether you need a quick side dish for a steak dinner or a healthy afternoon snack, leave the husk on, set the timer for four minutes, and enjoy the easiest cooking method available.
