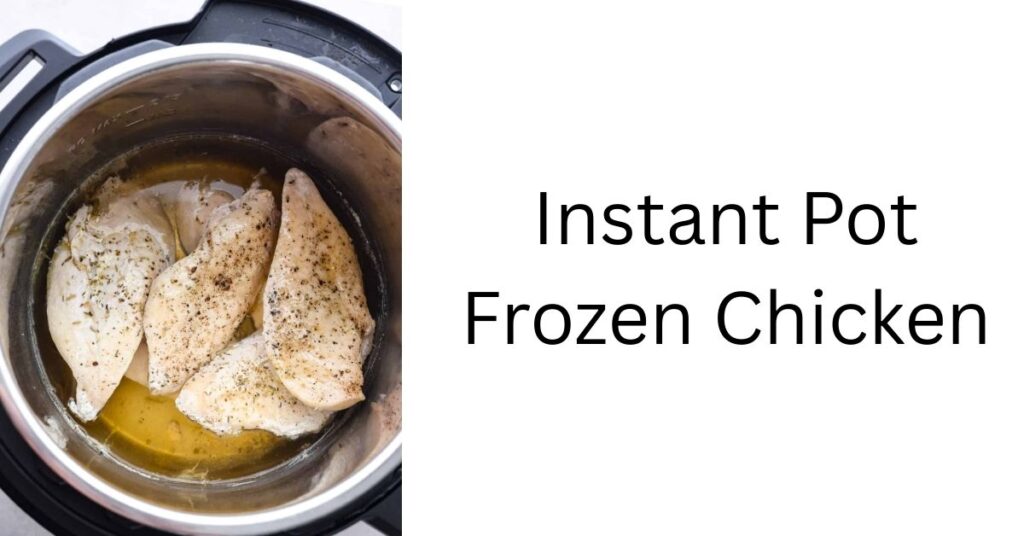
Instant Pot frozen chicken cooks safely in minutes; add the right liquid, set a sensible time, and verify 165°F with a thermometer.
Want tender chicken from rock-hard pieces without thawing? This walkthrough gives you reliable times, liquid amounts by pot size, a dead-simple method, and safety guardrails. You’ll pressure cook from frozen, keep moisture in the meat, and finish with juicy slices ready for meals all week.
Instant Pot Frozen Chicken Times By Thickness
Times below assume High Pressure, pieces placed on a trivet if possible, and quick seasoning. Always confirm 165°F (74°C) in the thickest spot with a probe. That temperature is the accepted safe minimum for poultry per federal food safety guidance.
| Cut / Size | High Pressure Time | Notes |
|---|---|---|
| Breast, 1/2 inch thick (frozen flat) | 8–9 minutes | Natural release 5 minutes; check 165°F |
| Breast, ~3/4 inch thick | 10–11 minutes | Natural release 5–10 minutes |
| Breast, ~1 inch thick | 12–13 minutes | Natural release 10 minutes |
| Tenderloins (frozen) | 6–7 minutes | Quick release; verify temp |
| Thighs, boneless skinless | 11–12 minutes | Natural release 5–10 minutes |
| Thighs, bone-in | 13–15 minutes | Natural release 10 minutes |
| Drumsticks | 12–14 minutes | Natural release 10 minutes |
| Wings (party wings) | 8–10 minutes | Quick release; finish under broiler if you like |
Core Method That Works Every Time
Setup
Place the metal trivet in the inner pot. Add the minimum liquid for your model (see the liquid table later). Use water or broth. Season the frozen pieces on both sides; dry spices cling fine even on frosty surfaces.
Load The Pot
Lay pieces in a single layer when you can. If some are stuck together, run them under cool water for a minute and pry them apart. Stacked chunks can cook unevenly and extend the time to pressure.
Pressure Cook
Set to High Pressure using the time that matches thickness and cut. Thicker than 1 inch? Add 1–2 minutes. Very small pieces? Drop 1–2 minutes. Close the lid, set the valve to seal, and let it pressurize.
Release And Check
Use the release noted in the table. Probe the thickest piece. If it’s below 165°F, reseal and cook for 2 more minutes on high, then quick release. That small bump is faster than guessing with longer first runs.
Rest, Slice, And Use
Rest 5 minutes before slicing or shredding to keep juices in. Use right away, or chill fast for meal prep bowls, tacos, pasta, or salads.
Safety Rules That Keep Chicken Tasty And Safe
Cook To A Real Temperature
Use a thermometer. 165°F (74°C) in the center ends the guesswork and keeps you within the food safety line for poultry. Federal agencies publish the same target across materials; you’ll see 165°F repeated in official charts.
Cooking From Frozen Is Fine
Pressure brings the meat through the “danger zone” quickly. That’s why cooking from frozen is allowed in this setup. What’s not advised: slow cooking frozen poultry, since low heat holds the meat in the unsafe band for too long.
Clean Handling Matters
Keep raw juices away from ready-to-eat items. Use separate boards and plates, wash hands for 20 seconds after handling raw meat, and clean tools with hot, soapy water. Skip rinsing raw chicken; it spreads droplets around the sink.
Seasoning Shortcuts That Love Pressure
Dry Rubs
Frozen surfaces grab salt, pepper, garlic powder, onion powder, smoked paprika, cumin, oregano, and chili powder. Keep sugar low to avoid sticky residue on the liner.
One-Cup Flavor Boosters
Swap water for low-sodium broth. Add a splash of lemon juice, coconut aminos, soy, or hot sauce. Toss in crushed garlic or a bay leaf. Keep the overall liquid at or above your model’s minimum.
Instant Pot Frozen Chicken: Liquid And Release Guide
Liquid volume is not guesswork. Manufacturers list minimums by size so the pot can build steam and pressurize. Use this quick chart for common models:
| Pot Size | Minimum Liquid | Release Tip |
|---|---|---|
| 3-quart | 1 cup (250 mL) | Quick release works well for thin pieces |
| 6-quart | 1½ cups (375 mL) | Natural release 5–10 minutes for thicker cuts |
| 8-quart | 2 cups (500 mL) | Natural release 10 minutes for bone-in pieces |
Why Your Results Vary (And How To Fix It)
Thickness Beats Weight
Two 8-ounce breasts can cook very differently if one is plump and the other is thin. Measure thickness and use the table time that matches it. If you only know weight, start at 10–11 minutes and adjust next time.
Pieces Stuck Together
Frozen clumps act like one thick block. Separate under cool water before cooking, or add 2–4 minutes and expect uneven edges. Separation keeps the surface area exposed to steam and speeds heat transfer.
Liquid Below The Minimum
Too little liquid can block pressurizing or trigger a burn warning. Match the minimums by pot size and raise the trivet if you want the meat above the liquid line.
Natural vs Quick Release
Natural release lets the temperature stay high for a bit longer, which gently finishes thick pieces. Quick release stops cooking sooner and keeps thin cuts from overshooting.
Exact Steps: Boneless Breasts From Frozen
- Put the trivet in the pot. Add the minimum liquid for your size (water or broth).
- Season both sides of the frozen breasts. Place in a single layer on the trivet.
- Set High Pressure for 10–12 minutes (match thickness from the table).
- Natural release 5–10 minutes, then vent.
- Check 165°F in the center. If low, reseal for 2 minutes and quick release.
- Rest 5 minutes. Slice, shred, or cube for recipes.
Shred, Slice, Or Cube Without Drying Out
Shredded
Return shredded meat to the warm pot with a few tablespoons of cooking liquid. Stir, then let it stand for a minute to reabsorb juices.
Sliced
Slice across the grain while the meat is warm. Drizzle with a spoon of broth to keep the surface glossy and tender.
Cubed
Cut larger chunks first, then smaller cubes. This reduces tearing and keeps pieces neat for salads and bowls.
Meal Prep And Storage
Cooling
Spread warm chicken on a sheet pan for 10 minutes so steam can escape. Pack in shallow containers.
Refrigeration
Refrigerate within two hours. Use cooked chicken within 3–4 days. Reheat to steaming hot before eating.
Freezing Leftovers
Freeze in 1–2 cup portions with a splash of broth. Label with date and cut. Thaw in the fridge, or reheat from frozen with a little extra liquid in a covered pan.
Trusted Rules And Where They Come From
Two checkpoints keep your process safe and repeatable. First, the 165°F poultry target is long-standing federal guidance. Second, manufacturers set liquid minimums so pressure can build correctly. You’ll find both in official resources. For the temperature standard, see the Safe Minimum Internal Temperature chart. For minimum liquid by size, check your model’s manual; a recent Duo/Pro manual lists 1½ cups for 6-quart and 2 cups for 8-quart units.
FAQ-Style Fixes Without The Fluff
Can I Cook From Frozen Safely?
Yes. Pressure cooking moves the meat through unsafe temperature bands fast. That’s why cooking from frozen is permitted in official thawing guidance. See the USDA’s note that cooking from frozen is safe in its defrosting overview.
Why No Slow Cooker For Frozen Chicken?
Slow heat can hold meat between 40°F and 140°F too long. That’s where bacteria multiply. Pressure avoids that by heating quickly.
Do I Need A Trivet?
It’s optional for chicken, but it helps keep pieces out of pooling liquid and makes lifting easier. If you skip it, don’t let pieces scorch on the bottom; liquid still needs to reach a simmer across the base.
Reference Links Inside This Guide
To keep this page self-reliant, here are two pinpointed sources placed where they help most:
- Poultry doneness target: FoodSafety.gov temperature chart.
- It’s safe to cook from frozen: USDA’s defrosting overview notes this in plain terms; see The Big Thaw.
Crisp Finish Ideas
Want a browned edge after pressure cooking? Brush with a little oil and your favorite dry rub, then broil on a sheet pan for a few minutes. Or toss cubes in a hot skillet for a quick sear. Do this after you confirm 165°F.
Flavor Variations That Work From Frozen
Lemon Garlic
Broth + lemon juice, garlic powder, oregano, black pepper.
Chipotle-Lime
Broth + chipotle in adobo, cumin, lime zest.
Herb Butter
Water + trivet; after cooking, toss hot pieces with soft butter, parsley, chives, and a pinch of salt.
Final Notes So You Nail It Next Time
- Use thickness-based times first; adjust by 1–2 minutes next run.
- Hit the liquid minimum for your size every time.
- Confirm 165°F with a probe; it’s quick and removes guesswork.
- For the phrase “instant pot frozen chicken,” use it when labeling your recipe cards or meal prep bins so you can find this method later.
Citations supporting key facts:
– Safe 165°F poultry temp: USDA FSIS Safe Minimum Internal Temperature Chart (2024/ongoing guidance).
Source: https://www.fsis.usda.gov/food-safety/safe-food-handling-and-preparation/food-safety-basics/safe-temperature-chart
– Cooking from frozen is allowed: USDA FSIS “The Big Thaw — Safe Defrosting Methods” (notes it is safe to cook foods from the frozen state).
Source: https://www.fsis.usda.gov/food-safety/safe-food-handling-and-preparation/food-safety-basics/big-thaw-safe-defrosting-methods
– Minimum liquid by size: Instant Pot Duo / Pro user manuals list 1 cup (3-qt), 1.5 cups (6-qt), 2 cups (8-qt).
Sources: https://images.thdstatic.com/catalog/pdfImages/96/96e22066-10a0-42ac-b33f-aeaa1a33a542.pdf and
https://www.everythingkitchens.com/amfile/file/download/file/3465/product/62586/
– Cross-contamination basics: CDC and FoodSafety.gov pages support handwashing and separate boards guidance.
Note: This page references federal safety targets and manufacturer manuals so home cooks can pressure cook chicken from frozen with confidence and consistency.
