Yes, you can microwave sour cream, but use low power in short bursts to prevent separation. Heating it too fast causes the dairy to curdle or split.
Sour cream adds a tangy richness to baked potatoes, nachos, and beef stroganoff. Most people serve it cold straight from the fridge. Sometimes, a recipe calls for room-temperature dairy, or you simply prefer a warm topping.
You might grab the tub and wonder if it is safe to zap it. The short answer is yes, but the method matters. Dairy products are sensitive to heat. If you blast them on high, you end up with a watery, lumpy mess instead of a smooth sauce.
Microwaves heat water molecules unevenly and rapidly. Since sour cream is an emulsion of water, fats, and proteins, this aggressive heating breaks the bond holding them together. We will look at how to do this correctly to keep your food appetizing.
Why Sour Cream Reacts To Heat
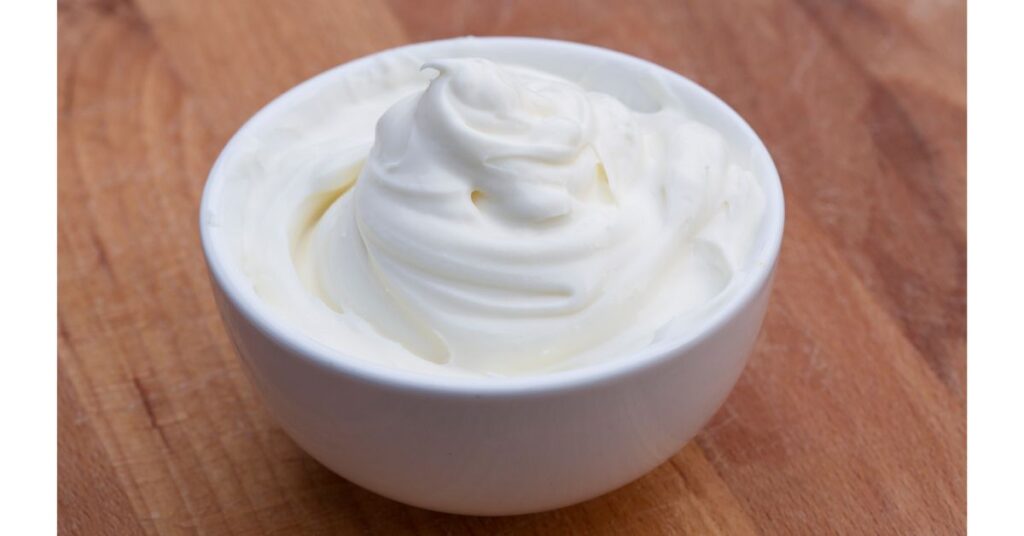
To understand the rules of heating, you need to know what sits inside that tub. Sour cream is cream fermented with lactic acid bacteria. This thickens the liquid and gives it that signature tart flavor. The protein structure is delicate.
When you apply heat, two things happen. First, the fat melts and turns to liquid oil. Second, the proteins contract and squeeze out the water. If this happens too fast, the components separate. You see a pool of yellow oil and white, grainy clumps.
High fat content usually helps stabilize dairy. Full-fat sour cream holds up better under heat than low-fat or fat-free versions. The extra fat coats the proteins and prevents them from clumping as quickly. Non-fat versions have more fillers and stabilizers that can break down weirdly in the microwave.
Can I Microwave Sour Cream Without Curdling?
You can avoid the separation issue with patience. The goal is to warm the cream gently rather than cooking it. You never want the sour cream to boil. Boiling guarantees curdling.
If you need to soften the cream for baking, the microwave is a fast tool. If you want to make a warm sauce, you have to be even more careful. Direct heat is the enemy of fermented dairy.
Below is a breakdown of different heating methods and how they affect the texture of your dairy. This will help you choose the right approach for your specific meal.
Comparison Of Heating Methods For Sour Cream
| Heating Method | Risk of Separation | Best Application |
|---|---|---|
| Microwave (High Power) | Extreme | None (Avoid this) |
| Microwave (Low/50% Power) | Low to Medium | Softening for baking |
| Room Temperature (Counter) | Zero | Baking ingredients |
| Warm Water Bath | Very Low | Warming for toppings |
| Direct Stove Heat | High | Cooking (Risky) |
| Double Boiler | Low | Making warm sauces |
| Tempering (Mixing) | Low | Adding to hot soups |
| Oven (Mixed in Dish) | Medium | Casseroles/Baked Goods |
Steps To Microwave Sour Cream Correctly
If you choose the microwave, do not just push the “Start” button. You need to control the power levels manually. This process works for full-fat and reduced-fat varieties, though full-fat is more forgiving.
1. Remove From Original Packaging
Do not heat the plastic tub. Most sour cream containers are made for cold storage, not microwave heat. We will discuss plastics in detail later, but for now, scoop the amount you need into a microwave-safe glass or ceramic bowl.
2. Use Lower Power Settings
Set your microwave to 50% power or “Defrost” mode. This pulses the energy waves, allowing the heat to distribute more evenly during the off-cycles. It prevents hot spots that instantly curdle the proteins.
3. Heat In Short Intervals
Run the microwave for 10 to 15 seconds. Open the door and check the texture. It might not feel warm yet, but the center could be heating up. Do not rush this part.
4. Stir Gently Between Bursts
Stirring is non-negotiable. It distributes the heat from the hot edges to the cold center. If you skip stirring, the edges will separate while the middle stays cold. Repeat the 10-second intervals until it reaches the desired consistency or warmth.
Is The Plastic Container Microwave Safe?
Convenience tempts us to toss the whole plastic tub into the microwave. You should resist this urge. Most dairy tubs are made of plastics designed for refrigeration, not high heat.
Check the recycling number on the bottom of the tub. Many are made from polypropylene (Number 5), which is generally considered microwave-safe by the FDA. However, others are made from plastics that warp or melt when exposed to hot fats. Even if the plastic does not melt, chemicals can migrate into your food when heated. According to the USDA Food Safety and Inspection Service, you should never use cold storage containers like margarine tubs, cottage cheese cartons, or yogurt cups in the microwave.
The safest bet is to transfer the sour cream to a glass bowl (like Pyrex) or a ceramic dish. This takes ten seconds and removes any risk of chemical leaching or melted plastic ruining your dinner.
Common Mistakes That Ruin Sour Cream
People often ruin their dip or sauce by ignoring the delicacy of the product. Here are the traps you must avoid.
Overheating The Product
Once sour cream reaches a boil, it is game over. The separation is irreversible. Aim for lukewarm or warm, never hot. If you see steam rising aggressively or bubbles forming, you went too far.
Ignoring Fat Content
Fat-free sour cream contains thickeners like cornstarch or gums to mimic the texture of fat. These stabilizers break down differently than natural cream. They can turn gelatinous or watery in the microwave. Stick to full-fat sour cream if you plan to heat it.
Covering It Tightly
Do not seal the lid or put tight plastic wrap over the bowl. Pressure builds up inside. While sour cream is unlikely to explode like a sealed egg, the steam gets trapped and heats the surface too fast. Use a loose paper towel to cover it. This catches splatters but lets steam escape.
Alternatives To Microwaving Sour Cream
The microwave is fast, but it is harsh. Other methods provide gentler heat control. If you have time, these alternatives yield better texture.
The Countertop Method
If you are baking a cheesecake or cake, recipe writers insist on room-temperature ingredients. This ensures the batter mixes evenly. You do not need the microwave for this. Measure out the sour cream 30 to 45 minutes before you bake. Let it sit on the counter. It will soften naturally without any risk of separation.
The Warm Water Bath
This is the restaurant trick for warming sauces. Place your sour cream in a metal or glass bowl. Fill a larger bowl with hot (not boiling) tap water. Set the sour cream bowl inside the water bowl. The gentle heat transfers through the glass. Stir occasionally. This takes about 5 minutes and keeps the texture silky.
Tempering For Hot Soups
If you add cold sour cream directly to boiling soup, it curdles instantly. You must temper it. Scoop the sour cream into a separate bowl. Ladle a small amount of the hot broth into the sour cream and whisk vigorously. This raises the temperature of the cream slowly. Once the mixture is warm and smooth, pour it back into the main pot.
Can I Microwave Sour Cream For Baking?
Yes, this is one of the most common reasons to use the appliance. Cold dairy hits a batter and solidifies the fats (butter), leading to a lumpy cake. You want the sour cream close to 70°F (21°C).
Use the 50% power method described earlier. You only need to take the chill off. Do not make it hot. If it feels neutral to the touch—neither cold nor hot—it is ready for your batter. If you accidentally overheat it and it separates slightly, you can sometimes whisk it back together, but serious separation might make your cake greasy.
Fixing Separated Sour Cream
You microwaved it too long. Now you have a bowl of white curds floating in yellow oil. Can you save it? Sometimes.
If the separation is minor, remove it from the heat immediately. Add a teaspoon of cold milk or liquid heavy cream. Whisk it vigorously. The cool liquid helps drop the temperature, and the agitation might re-emulsify the fats.
For cooked sauces like Stroganoff, you can try adding a slurry. Mix a teaspoon of cornstarch with a tablespoon of cold water. Pour this into the broken sauce and whisk. The starch binds the water and fat, creating a smooth texture again. This changes the flavor slightly but saves the dish from looking unappealing.
If the sour cream has turned into hard, scrambled-egg-like curds, there is no fix. You have to start over.
How To Tell If It Is Spoiled
Sometimes separation happens because the product is old, not because you heated it wrong. Check the smell. Fresh sour cream smells tangy but clean. Spoiled dairy smells sharp, moldy, or rancid. If you see pink or green mold on the surface, discard the entire tub. Heat will not make spoiled food safe to eat.
Troubleshooting Texture Issues
Understanding the visual cues helps you stop before you ruin the dish. Use this guide to diagnose what is happening in your microwave bowl.
| Visual Symptom | Likely Cause | Corrective Action |
|---|---|---|
| Water pooling on top | Slight overheating | Stir briskly to re-incorporate. |
| Grainy texture | Proteins tightening | Add cold cream and whisk. |
| Yellow oil separation | Fat melting (broken emulsion) | Use a starch slurry or discard. |
| Hard white clumps | Severe overheating | Discard; cannot be fixed. |
| Skin forming on top | Surface drying out | Stir skin in or skim off. Cover next time. |
| Exploding/Splattering | No cover/High heat | Clean microwave; use paper towel cover. |
Safe Handling Of Dairy Products
Food safety extends beyond just preventing curdling. Dairy products sit in the “danger zone” when left between 40°F and 140°F for too long. Bacteria multiply rapidly in this range.
If you microwave sour cream for a potato topping, use it immediately. Do not heat it, let it sit on the counter for two hours, and then put it back in the fridge. The heating process disrupts the culture balance that keeps sour cream safe for weeks in the fridge. Once heated, you should consume it or toss the leftovers.
Always use a clean spoon. Dipping a used tasting spoon back into the tub introduces bacteria and saliva enzymes that break down the cream, making it watery over time. According to Oregon State University Extension, proper handling and temperature control are vital for preventing foodborne illness with dairy products.
Using Sour Cream In Hot Dips
Warm dips like spinach artichoke or queso often use sour cream as a base. The microwave is a popular way to make these. To ensure success, mix the sour cream with other ingredients before heating.
Combining sour cream with cream cheese, mayonnaise, or shredded cheese adds stability. The extra fats and solids protect the sour cream proteins. Even with these buffers, stick to the low-heat rule. Heat the dip in 30-second bursts, stirring every time to ensure the cheese melts evenly without the sour cream breaking.
Summary Of Heating Rules
You can successfully microwave sour cream if you respect its chemistry. It is not like heating up a slice of pizza. It requires attention and lower energy settings.
Remember to transfer it out of the plastic tub first. This protects your health and prevents melted plastic messes. Use 50% power to ensure gentle warming. Stir every 10 to 15 seconds to distribute that heat. If you see any oil rising to the top, stop immediately.
For the best results in cooking, consider tempering the cream or using a water bath. But for a quick potato topping or baking prep, the microwave works fine if you are careful. Now that you know the technique, you can microwave sour cream without fear of ruining your meal.
